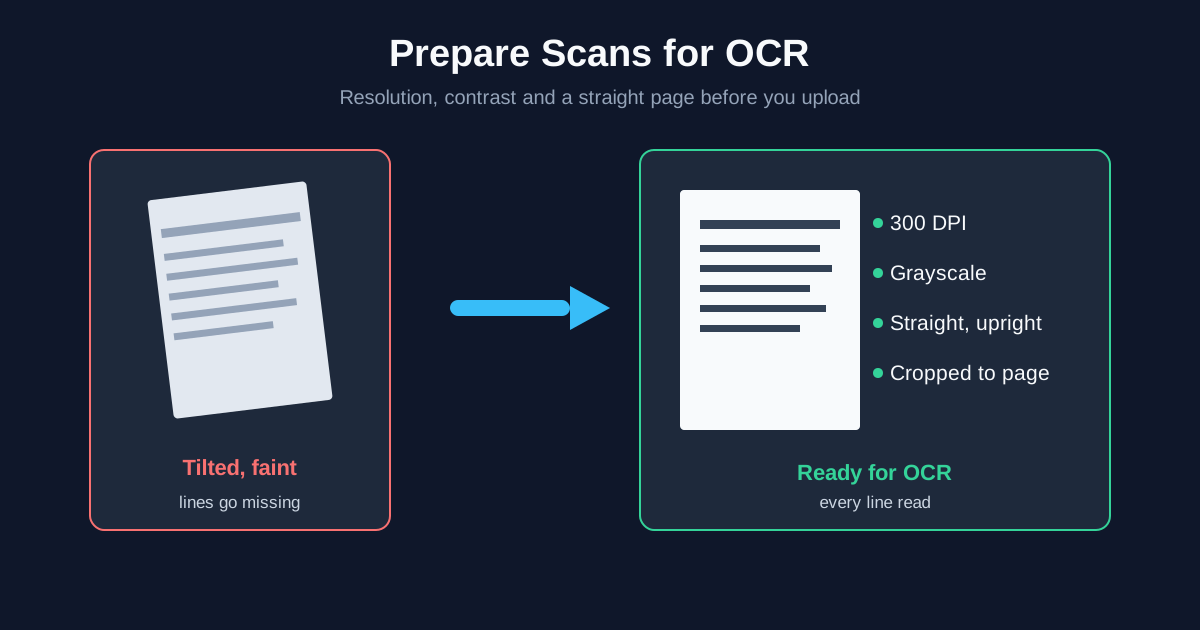
The best scan settings for OCR are simple: 300 DPI, grayscale, the page straight and the right way up, cropped to the paper. Going above 300 DPI doesn't help and black-and-white mode can wipe out faded text. Tilt and orientation matter less than they used to: our online OCR tools turn sideways and upside-down pages upright and read tilted lines on their own. Here's what to set, what we tested, and when it's still worth straightening a scan.
Best Scan Settings for OCR at a Glance
| Setting | Use | Why |
|---|---|---|
| Resolution | 300 DPI | Enough for body text and small print; more adds file size, not detail |
| Colour mode | Grayscale (colour is fine too) | Keeps faint strokes that black-and-white mode can erase |
| Orientation | Upright, not tilted | Our OCR corrects it, but many other OCR apps lose lines on tilted pages |
| Crop | Page edges only | Less background, more pixels spent on the text |
| File type | PDF, PNG or high-quality JPG | The formats the OCR tools accept |
| Language | Pick it if you know it, or keep Automatic | Automatic picks the model per page; picking by hand helps with Traditional Chinese |
The rest of this guide explains each line, with the test results behind it.
What Resolution (DPI) Is Best for OCR?
Scan at 300 DPI. It's the standard for OCR for a reason: small print stays legible and the file stays a sensible size.
There's no point going higher with our tools. When you upload a PDF, every page is rendered as a 300 DPI image before it's read — a 600 DPI scan gets redrawn at 300 anyway. Photos and PNGs are read at their own size, but large images are scaled down to a working size of roughly 2,000 pixels on the long side before recognition starts. Extra pixels beyond that only make the upload slower.
We checked this with a test page: a six-line business letter set in 11-point serif type, generated as an image at different resolutions and run through the same recognition our OCR tools use. Every line came back word-perfect from 100 DPI up to 600 DPI, and even 6-point text on a full A4 page read correctly at 300 DPI. That's a clean digital page, so treat it as the best case: real paper adds grain, smudges and blur, which is why 300 DPI, not 150, is the safe setting for a scanner.
If you're wondering what DPI actually means for an image and why the number in a photo's properties can be misleading, our guide to DPI for print vs screen explains it.
Check the DPI of a Scan You Already Have
Open the file in the DPI checker — it reads the image header in your browser and shows the stored DPI and pixel size. For OCR, the pixel size is what counts. An A4 page at 300 DPI is about 2480 × 3508 pixels; if your "300 DPI" file is only 800 pixels wide, the DPI tag is lying and the text will be soft. Changing the DPI number afterwards doesn't add detail either — only rescanning does. How to check photo DPI walks through reading those numbers.
Grayscale, Colour or Black and White for OCR?
Grayscale is the safe choice. Colour works just as well and only makes the file bigger. Black-and-white (1-bit, "Text" or "Line art" mode) is the risky one.
Black-and-white mode forces every pixel to pure black or pure white at a fixed cut-off. On a crisp laser print that's harmless. On a faded page it can throw the text away. In our test, a page with pale grey text on a grey background read perfectly as grayscale — and came back completely empty after we converted it to black and white with the cut-off set too dark. The same page converted with a lighter cut-off read fine, but you can't see where that line is when you press Scan.
So:
- Clean, dark print — any mode works
- Faded, yellowed or photocopied pages — grayscale, never black and white
- Coloured paper or highlighter — grayscale or colour
Contrast: What to Do with Faint and Faded Originals
Recognition cares about the difference between ink and paper, not about how dark the page looks overall. Pale text that is still sharp usually survives — our faded test page read correctly as grayscale. What kills faint text is losing the edges of the letters.
- Don't push brightness up in the scanner software to "whiten" the page; it bleaches thin strokes first
- Leave "background removal" and "text enhancement" off unless you've checked a sample — they're black-and-white conversion under another name
- Shadows and uneven light are less of a problem than you'd think for print; a strong shadow across our test page didn't cost a word. Glare that washes letters out completely is different — no setting brings those back
Tilted and Sideways Pages: What OCR Fixes for You
Our OCR tools now handle a crooked page on their own: they turn sideways and upside-down pages upright before reading, and they follow tilted lines instead of mixing them up. We re-ran our tilt test on the current version:
| Page position | Result |
|---|---|
| Straight | All lines, in order |
| Tilted 2°, 5°, 8° and 12° (a 20-line page) | All 20 lines, in order |
| Sideways (90°) | All six lines, in order |
| Upside down (180°) | All six lines, in order |
A straight scan still pays off. Other OCR apps are far less forgiving, and in a searchable PDF the page image is what people see: we turn sideways and upside-down pages upright there, but a small tilt stays in the picture.
How to Straighten a Scan Before OCR
- On the scanner: turn on "Auto deskew", "Straighten" or "Correct skew" in the scanning software, and push the page against the glass edge
- With a phone scanner app: the scanner in iPhone Notes (Scan Documents), the Google Drive app on Android and Microsoft Lens all detect the page edges, crop and square the page for you
- Windows 11 Photos: open the image, Edit image → Crop, and drag the straighten slider until text lines are level
- Mac Photos: Edit → Crop, then turn the dial below the image
- Command line:
magick scan.png -deskew 40% straight.pngstraightens an image with ImageMagick - Sideways or upside-down PDF pages: OCR turns them upright for you; to fix them in the original PDF as well, use rotate and reorder PDF pages
Crop Margins, Dark Borders and Book Gutters
A dark frame from an open scanner lid didn't confuse our test at all, so you don't need to crop scans for neatness. You do need to crop phone photos, because of that 2,000-pixel working size: if the page fills half your 12-megapixel frame, half of the detail goes on your desk, not your text.
Book pages are harder. The curve near the spine bends lines, and bent lines behave like tilted ones. Press the book flat on the glass (a heavy book on the lid helps), put the spine at the edge of the glass rather than in the middle, and scan one page at a time. Phone scanner apps can flatten a curved page somewhat — use one when the book won't lie flat.
Photographing Documents for OCR with a Phone
A phone is a perfectly good scanner if you shoot it like one:
- Lay the page flat on a dark, plain surface, so the edges stand out
- Hold the phone straight above it, parallel to the paper
- Use daylight or two light sources, and switch the flash off on glossy paper
- Move closer instead of zooming — digital zoom just enlarges pixels
- Crop to the page before upload, or use a scanner app that does it
iPhones save photos as HEIC, which the OCR tools don't accept. Switch the camera to "Most Compatible" or convert first with HEIC to JPG. For PNG vs JPG: both are accepted, and in our test even heavily compressed JPG didn't break clean print. Keep JPG quality at your camera's default and don't re-save the photo several times.
Pick the Document Language
Resolution won't rescue a page read in the wrong alphabet. Every OCR page has a Document language menu with 29 languages, from German and Polish to Russian, Arabic, Hindi, Japanese and Chinese — OCR PDF to searchable PDF, PDF to Word, the image tools and the "to text" pages that show the result on screen. Automatic picks the model from the script it finds on each page, so a document whose pages are in different languages is read without splitting. If you know the language, pick it before uploading — it can't do worse than Automatic, and it matters for Traditional Chinese, which Automatic reads with the Simplified model. A line in another script on the same page, like an English line on a Russian page, is read with that page's model, so keep such parts on their own page if you need them exact. How online OCR works shows what the language choice changes.
Test One Page Before You Scan the Whole Stack
Before scanning 80 pages, scan one representative page — the one with the smallest print or the palest ink — and run it through OCR. Compare a paragraph against the paper. If lines are missing, check resolution and contrast first; if letters are wrong, check sharpness and language. For a structured way to judge the result, how to measure OCR accuracy explains character and word error rates in plain words.
Summary
Scan at 300 DPI in grayscale, keep every page straight and upright, crop phone photos to the page, and pick the document language. Tilted and upside-down pages no longer cost you text in our OCR, but a straight scan still looks better and works with every other reader. Then run the file through the OCR tools and check one page before the rest.
Related Tools
- OCR tools — PDF, JPG and PNG to searchable PDF, Word or text
- OCR PDF to searchable PDF — add a text layer to a scanned PDF
- DPI checker — see the stored DPI and pixel size of a scan
- Rotate and reorder PDF pages — turn sideways and upside-down pages upright
- HEIC to JPG — convert iPhone photos before OCR