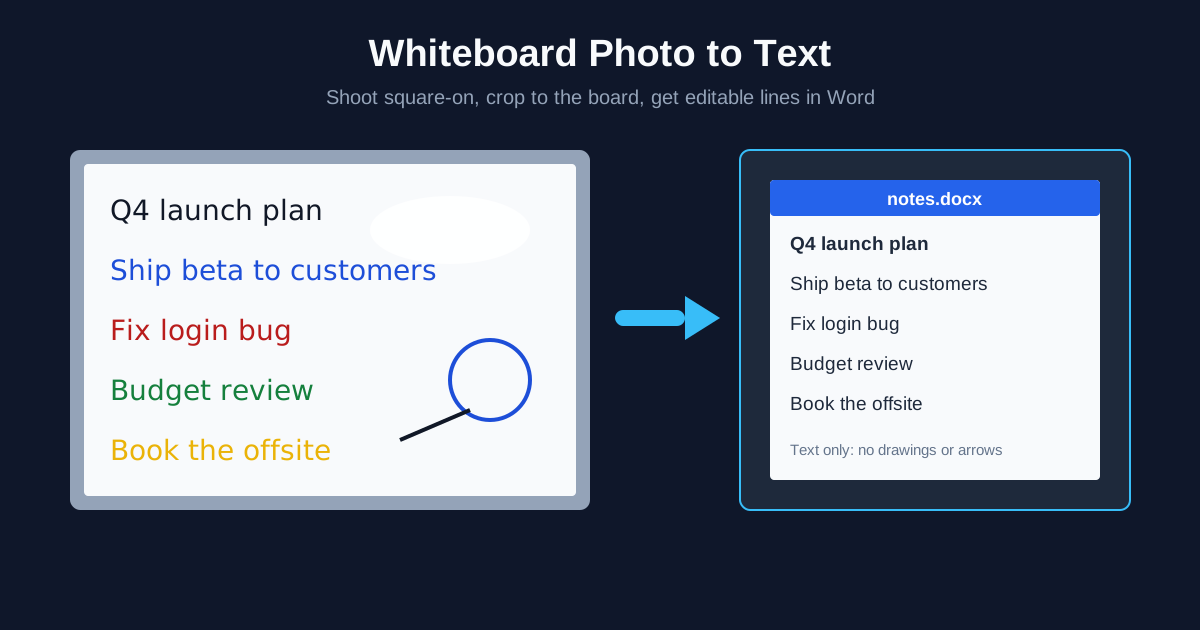
To turn a whiteboard photo into text, shoot the board square-on without flash, crop the photo to the board, and upload it to JPG to Word OCR. You get an editable DOCX with the writing as lines of text. Printed words and big, dark marker writing come through well; thin, pale strokes don't, and drawings and arrows arrive as pictures rather than text. Here's how to take the photo, what we saw on real boards, and what to do with slides.
How to Convert a Whiteboard Photo to Text in 4 Steps
- Take the photo straight in front of the board, flash off, the board filling the frame
- Crop to the board in your phone's photo editor, so no wall, window or people are left around it
- Upload it to JPG to Word and set Document language if the board isn't in English — the menu has 29 languages
- Download the DOCX and fix names, numbers and anything written small
If you only need the words to paste into a chat or a task list, JPG to text shows the recognised text on the page with a Copy button, no file to open. It has the same Document language menu.
Photos from an iPhone are HEIC by default, and the OCR tools take JPG, PNG and PDF. Convert them with HEIC to JPG first, or set the camera to "Most Compatible".
What Our OCR Read from Real Whiteboard Photos
We ran two real whiteboard photos from Wikimedia Commons through the same recognition our JPG to Word tool uses, with the language left on Automatic.
A station status board — printed labels plus station names written in black marker:
- Every printed label came out correct: "STATION ELEVATOR STATUS", the line names, the phone numbers
- Most marker entries were right: "WILSON", "Roosevelt", "Central. INDIANA N/B", "Ashland", "PULASKI"
- Some weren't: "Washington/Wabash" became "Washington/Wabstm", "Belmont (S/B)" became "Belmont(sl0)", and the time "2:00 P.M." lost its colon
A meeting board — a sentence and a few labels in thin marker, around circles, arrows and sketches:
- The larger, darker words came through: "Kurt Lewin", "(SCRUM)", "Action Research", "IST", "Soll"
- The main sentence across the top, written in a thin, pale stroke, didn't come out at all
- The drawings produced nothing useful — a stray letter at most
The pattern is the same one you see with any handwriting: size and stroke weight decide the result. Block capitals in a fresh, thick marker read; quick cursive in a dying one doesn't. For a closer look at how the OCR handles handwriting on paper, see handwritten text recognition.
How to Photograph a Whiteboard for OCR
Avoid Glare and Reflections
Whiteboards are glossy. A ceiling light or window reflected in the board is a white patch where the ink disappears.
- Turn the flash off — it puts a bright spot right in the middle
- Step a little to the side if you see a reflection, then straighten the photo afterwards
- Switch off the light nearest the board or close a blind if the glare won't move
In a simulated test — a board photo with writing in five marker colours and a glare spot over one line — the line under the glare still came back, but with a typo ("cusiomers"). A stronger reflection that washes out the ink completely can't be recovered.
Shoot Square-On and Crop to the Board
Stand in front of the middle of the board and hold the phone parallel to it. Then crop the photo to the board. Cropping matters more than people expect: large photos are scaled down to about 2,000 pixels on the long side before the text is read. If the board fills only half of your frame, half of those pixels go on the wall. For a big board covered in small writing, take two photos — left half and right half — rather than one from the back of the room.
The photo is read as you upload it, so if you had to shoot at an angle, level the lines with your phone's crop tool first, or photograph the board with a document scanner app (iPhone Notes, Google Drive, Microsoft Lens), which squares off the board for you. The same principles apply to paper; our guide to preparing scans for OCR shows what tilt does to the result.
Marker Colours and Contrast
Black and dark blue are the safest. Red and green are fine when the marker is fresh. Yellow, orange, light green and any dry marker are the risk: they're pale against white, and pale thin strokes were exactly what disappeared from the real meeting-board photo.
In our simulated board, all five colours — yellow included — were read, but that was clean lettering at a generous size. On a real board, go over anything important in a dark marker before you take the photo.
Erase the Ghosts First
That simulated board also held two faint ghosts of old, half-erased writing — the kind of grey shadow you get from a board that's been wiped with a dry cloth. The OCR read both ghosts and slotted them into the text between the real lines. Wipe the board properly before a session, or delete the ghost lines from the document afterwards.
Several Whiteboards or Flipchart Pages into One Document
You have two options:
- One document per photo: select all the photos on JPG to Word. The page queues them, converts each one and lets you download all as a ZIP
- One document for all of them: put the JPGs in a ZIP file and upload it to multiple JPG to Word. The pages appear in the order of the file names, so name them 01.jpg, 02.jpg and so on. This tool has the same Document language menu
What You Get in the Word Document
- Each detected line of writing becomes a line of text, in top-to-bottom, left-to-right order
- Big writing can become a heading. Lines noticeably taller than the rest get Word's Heading styles — on the status board, the marker entries were styled as headings because they were larger than the printed labels. Select all and apply Normal if that's not what you want
- Items that line up in columns may be rebuilt as a Word table
- Drawings come across as pictures — boxes, arrows and sketches are cropped from the photo and placed as images, not as editable shapes. Keep the original photo next to the notes if the whole diagram matters
Two side-by-side columns on a board can be read across instead of down, because lines at the same height are joined. If your board has columns, photograph each one separately.
How to OCR a Photo of a Slide
A slide is easier than a whiteboard — it's printed text — but a photo of a screen brings its own problems:
- Keystone: a projector image photographed from your seat is a trapezoid. Crop and straighten it, as with a board
- Moiré: a monitor or TV photographed up close shows wavy patterns over the text. Step back a little and change the angle slightly until the pattern goes
- Glare on a glossy screen — same fix as a whiteboard
Before you photograph anything, ask whether you can get the file. If the presenter shares the deck as a PDF, the text is already inside it: convert it with PDF to Word instead of OCR, and you'll get the exact wording. A screenshot from a video call is a clean PNG and reads better than any photo of a screen — upload it to PNG to Word OCR.
For other ways to pull text out of pictures — Google Lens, Live Text on iPhone, the Windows Snipping Tool — see how to extract text from an image.
Summary
A whiteboard photo turns into usable text when the writing is big, dark and glare-free and the photo is cropped to the board. Expect printed text and clear marker capitals to come through, and small, thin or pale writing to go missing. Take the photo square-on, wipe off old ghosts, and run it through JPG to Word OCR.
Related Tools
- JPG to Word OCR — whiteboard photo to an editable DOCX, with a language menu
- Multiple JPG to Word — several boards from one ZIP into one document
- JPG to text — copy the words straight from the page
- PNG to Word OCR — slide screenshots to DOCX
- HEIC to JPG — convert iPhone photos first