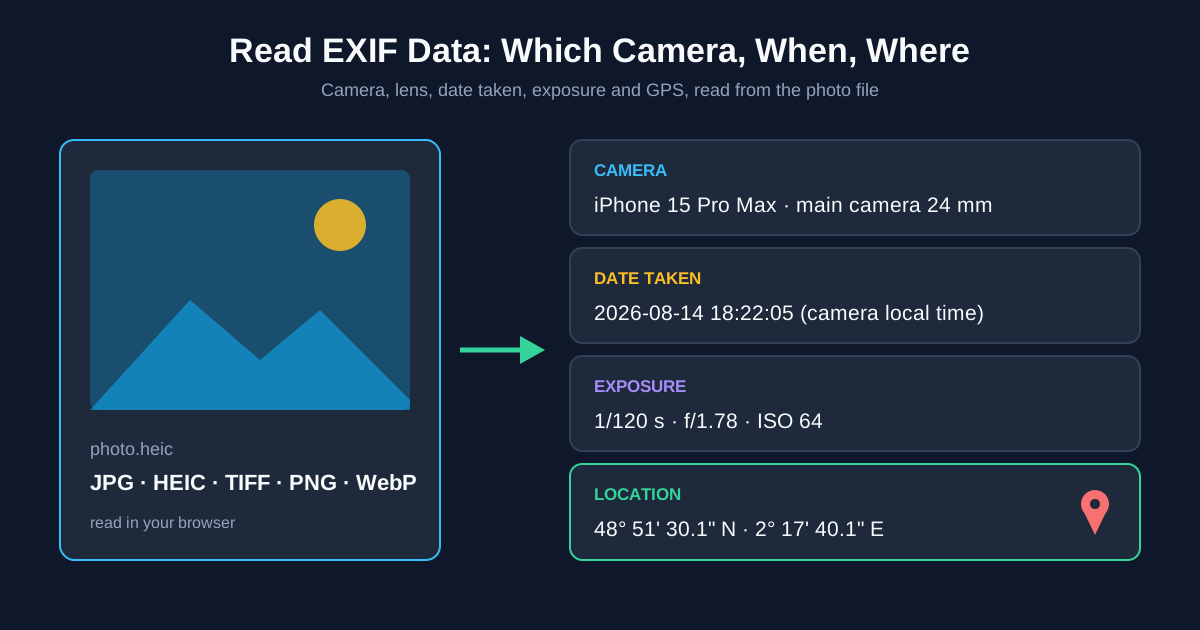
To read EXIF data, open the photo in an EXIF viewer or in your system's file info panel: you'll see the camera and lens, the date and time it was taken, the exposure settings and, if location was on, the GPS coordinates. The quickest route is to drop the file into the EXIF viewer — it takes JPG, HEIC, TIFF, PNG and WebP, and the reading happens in your browser, so results appear the moment the file loads.
Below: what each field means, how to find where and when a photo was taken, how to read EXIF on iPhone, Windows and Mac, and why some photos show nothing at all.
How to Read EXIF Data Online in Three Steps
- Open the photo metadata viewer and select a photo. iPhone HEIC files work directly — no conversion needed.
- Read the cards from top to bottom: Camera, Date & Time, Exposure, Location and Image Settings. A card only appears if the file has data for it.
- If you see "No EXIF metadata found", the file was stripped somewhere along the way — the section on photos with no EXIF below lists the usual suspects.
We checked the viewer against an original iPhone 15 Pro Max HEIC and against the JPG our HEIC to JPG converter made from it. Both showed the same camera, lens, capture time and coordinates to the last decimal, so converting first isn't required — and it doesn't lose anything either.
What EXIF Data Holds (and What Each Field Tells You)
EXIF is a block of tags the camera writes into the file at the moment of capture. The viewer groups them like this:
| Card | Fields | What it's good for |
|---|---|---|
| Camera | Make, model, software version, lens | Which device took the photo, which of the phone's lenses, which OS version |
| Date & Time | Taken; Digitized if it differs; Modified if there's no Taken date | When the shutter fired |
| Exposure | Shutter speed, aperture, ISO, focal length (with 35 mm equivalent), program, exposure bias, metering, flash, white balance | Why the photo looks the way it does |
| Location | Latitude, longitude, altitude, decimal coordinates | Where the photo was taken |
| Image Settings | Colour space, orientation (when rotated) | Technical checks before print or upload |
Above the cards you'll also see the pixel size, format and megapixels.
Two fields are easy to misread:
- Lens on a phone isn't a lens you bought. A line like "iPhone 15 Pro Max back triple camera 6.765mm f/1.78" names the main wide camera. The telephoto and ultra-wide show different focal lengths.
- Focal length is the real one (6.765 mm above). The 35 mm equivalent (24 mm for that lens) is the number to compare with other cameras.
What Camera Took This Photo?
Look at the Camera card. Make and model are the most reliable EXIF fields: almost every phone and camera writes them, and almost no editor bothers to change them.
- Model tells you the device ("iPhone 15 Pro Max", "Pixel 8", "Canon EOS R6").
- Software is the firmware or app that last wrote the file. On an iPhone it's the iOS version. If it says "Adobe Photoshop" or "Snapseed", the photo was edited after capture.
- Lens is missing on many older cameras and on most photos that passed through an editor.
EXIF only tells you what the file claims. Tags are plain text inside the file and can be rewritten with free tools, so treat them as a strong hint, not proof.
How to Find the Date a Photo Was Taken
Use Taken (the tag called DateTimeOriginal). It's written when the shutter fires and survives copying, emailing and backing up.
Don't trust the date your file manager shows. That's the file system date — it changes when you download, copy or restore the file. A photo taken in 2019 and downloaded today shows today's date in Explorer or Finder, but EXIF still says 2019.
EXIF can hold three dates, and the viewer shows the one that matters:
- Taken — the moment of capture, always shown when present
- Digitized — usually identical, so it only appears when it differs (scanned film, where it's the scan date)
- Modified — the last time software saved the file; shown only when there's no Taken date, which itself suggests the photo went through an editor
One catch: the date is the camera's clock in local time, without a time zone. A photo taken at 16:20 in Paris says 16:20, whatever time zone you're in when you read it. Phones set their clock from the network, so their dates are dependable. A camera whose clock was never set isn't — older compacts often fall back to a default year after a battery change.
How to See Where a Photo Was Taken
If the phone had location on, the Location card shows latitude, longitude and altitude. Coordinates come in two formats:
| Format | Example | Where to use it |
|---|---|---|
| Degrees, minutes, seconds (DMS) | 48° 51' 30.1" N, 2° 17' 40.1" E | How EXIF stores it, how charts print it |
| Decimal | 48.858370, 2.294481 | Paste into Google Maps, Apple Maps or OpenStreetMap |
Copy the decimal pair into the search box of any map app and it drops a pin on the spot — the example above is the Eiffel Tower. Phone GPS is usually close outdoors and noticeably worse indoors, so expect the pin to sit near the spot rather than exactly on it.
Negative numbers matter: a minus sign in front of latitude means south, in front of longitude means west. If you copy DMS by hand, keep the N/S/E/W letter.
No Location card at all means one of three things: location was off in the camera settings, the phone had no fix (indoors, underground, airplane mode), or the location was removed later. A camera without GPS — most DSLRs — never writes it.
Found GPS you'd rather not share? That's a separate job: removing location data from photos strips it without touching the pixels.
How to Read EXIF on iPhone
Open the photo in Photos and swipe up, or tap the ⓘ button. iOS shows the camera model, lens, pixel size, file size, ISO, focal length, exposure, aperture and a map with the location.
What iOS doesn't show: the raw coordinates, altitude, the software version or the exposure program. For those, open the viewer in Safari and pick the photo, or read the original file on a computer. If a photo shows a map in Photos but no Location card in the viewer, the copy that reached the viewer lost its location on the way — try again with the original file, for example via the Files app or AirDrop to a Mac.
How to View EXIF Data on Windows
- Right-click the photo in File Explorer and choose Properties.
- Open the Details tab.
- Scroll through Camera (maker, model, exposure, ISO, focal length), Origin (Date taken) and GPS (latitude, longitude, altitude).
Windows shows coordinates only in degrees-minutes-seconds and doesn't open HEIC without an extension from the Microsoft Store — see HEIC on Windows if Explorer shows a blank icon.
How to View EXIF Data on Mac
- Open the photo in Preview.
- Choose Tools → Show Inspector (Cmd + I).
- Click the ⓘ tab, then EXIF for camera and exposure, and GPS for location with a small map.
In the Photos app, select the photo and press Cmd + I for a short summary: camera, lens, exposure and a map.
Why a Photo Shows No EXIF Data
"No EXIF metadata found" is common, and it's usually not a fault in the file:
- Screenshots never have camera data — nothing took a photo
- Messaging apps re-encode photos sent the normal way and drop most tags. A photo saved from a chat is rarely the original
- Social media downloads are re-compressed copies; the platform keeps what it wants and serves a stripped file
- Editors and "save for web" exports often leave metadata out to save bytes
- Compressed images — our own image compressor drops EXIF, GPS included, and keeps only the colour profile
- PNG files from phones and screenshots rarely carry EXIF, though some editors write it
If you need the original metadata, ask for the original file — sent as a document or file attachment, not as a photo in a chat.
Tips for Reading EXIF Correctly
- Missing Taken date but a Modified date? The photo was saved by software after capture, not straight from the camera
- Check Software. An editor name means someone opened and saved the photo
- Compare lens and focal length across a set of photos to see which camera on the phone took each one
- Read the pixel size before you print — the DPI checker turns it into a maximum print size, and our guide to checking photo DPI explains the numbers
- Keep originals. Converting PNG to JPG or HEIC to JPG creates a new file; metadata survives only if the converter copies it
Summary
To read EXIF data, trust the Taken date over the file date, use the decimal coordinates to find the spot on a map, and read Software to spot an edited file. The EXIF viewer shows all of it for JPG, HEIC, TIFF, PNG and WebP, with the reading done in your browser.
Related Tools
- EXIF viewer — camera, lens, date, exposure and GPS from a photo
- Remove EXIF data — strip location and camera tags without re-encoding
- HEIC to JPG — convert iPhone photos; EXIF and GPS carry over
- Image DPI checker — pixel size and print size for a photo
- HEIC to JPG on iPhone and Mac — camera settings and conversion options